Once you have generated a Certificate Signing Request (CSR) in Plesk Onyx and received your certificate files from your certificate authority, you need to follow these step-by-step instructions to install an SSL certificate on Plesk Onyx (Version 17).
Install an SSL certificate on Plesk Onyx (Version 17)
Step 1: Login to your Plesk control panel for SSL certificate installation.
Step 2: Locate Websites & Domains > example.com and click “SSL/TLS certificates” option, as per shown in the screenshot below:

Step 3: Now, you can view certificate list for SSL certificate installation, where choose your SSL/TLS certificate name “SSL_name” for your example.com website:

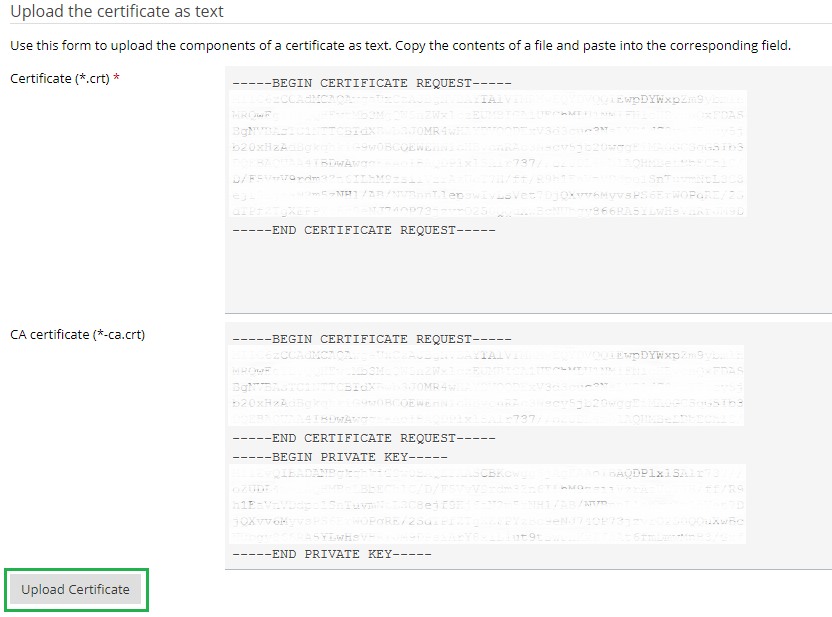
Step 4: Now you can see the screen “Change Properties of SSL/TLS Certificate” with your certificate name. There are two file options namely, Certificate (*.crt) and CA Certificate (*-ca.crt), where you can upload your Certificate (.crt) and CA certificate (.ca-bundle) files, which are issued by a certificate authority.

OR, Copy and paste the SSL Certificate (*.crt) and CA certificate (.ca-bundle) code as text format, as per shown in the screenshot below:
Step 5: Once the certificate (.crt) and CA bundle files are uploaded or certificate code pasted in text format, Click the “Upload Certificate” button when you finished.
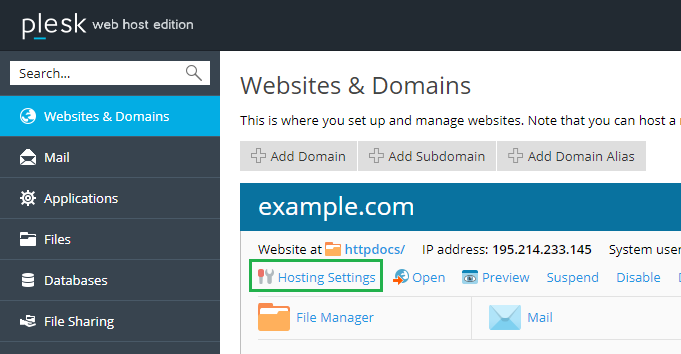
Step 6: Now, you have successfully installed your SSL certificate, the next step would be to enable SSL/TLS certificate to your website. You may complete this process by navigating again to the “Websites & Domains” tab from the left-hand menu. Next, click the “Hosting Settings” as seen below screenshot:
Step 7: Navigate to the “Security” section, and check both options “SSL/TLS Support Box” and “Permanent SEO-safe 301 redirect from HTTP to HTTPS” by selecting the SSL certificate that you uploaded from the list.

Step 8: Click on the “Apply” button to save the settings and complete the process of enabling the SSL certificate to your website using Hosting Setting option. As per shown in the screenshot below:

Step 9: Now you need to secure the Plesk login page. For this, you again need to log in as an administrator to get all the privileges of an administrator, then go to “Tools and Settings” and click the “SSL/TLS Certificates”.

Step 10: Now, you will notice there are two options under “Certificates currently in use for securing Plesk server” section as:
- Certificate for securing Plesk
- Certificate for securing mail
Select a certificate name for securing Plesk on your website. Then click the “OK” button.

Step 11: Finally, SSL certificate is successfully installed for your website that is indicated by the following message that pops up on your screen. This is an indication that your Plesk login is now secure.

After following the above instructions, you are all set to check your Plesk login page by your domain name and 8443 port as shown below:

All the above-described steps allow you to successfully complete the installation of an SSL certificate to your Plesk Onyx version 17. Additionally, this post also provides you all necessary instructions to secure a Plesk login page for your website.
You can check online SSL installation checker to confirm if the certificate is installed correctly and site working on HTTPS version.
