This walkthrough explains how to add the cross-signed version of “Sectigo Public Server Authentication Root R46/E46” (issued by “USERTrust RSA Certification Authority”) on a Windows server and remove the self-signed version of that same root certificate if it exists.
When the self-signed root remains in the store, Windows may build a local trust path that differs from the public browser trust chain. The result can be trust warnings even though the server certificate itself is valid.
By the end of this guide, you will:
- Install the correct cross-signed certificate into the proper Windows store
- Remove the conflicting self-signed root certificate
- Verify that Windows builds the expected certificate chain
- Confirm the SSL binding in Microsoft IIS
After completing these steps, IIS will present a complete and publicly trusted certificate chain.
Prerequisites
You will need:
- The cross-signed intermediate certificate file (.crt, .cer, or .p7b)
- Administrative access to the Windows server running IIS
- Direct access to the Local Computer certificate store
Perform these steps on the actual IIS server.
Step 1 – Import the Cross-Signed Intermediate
- Install the correct cross-signed intermediate into the machine store.
- Press Win + R
- Type certlm.msc
- Click Enter

This opens the Local Machine certificate store.
-
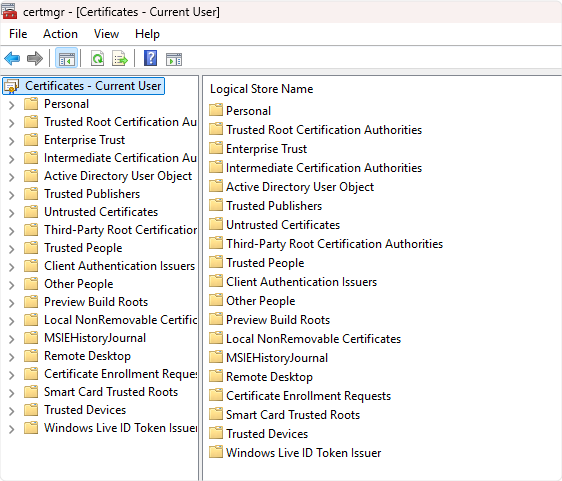
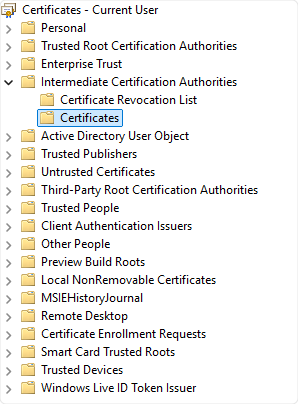
Navigate to:
Intermediate Certification Authorities → Certificates
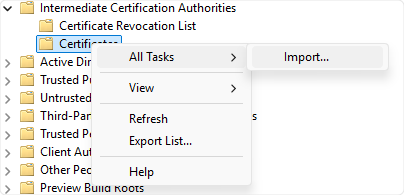
-
Right-click Certificates → All Tasks → Import

- The Certificate Import Wizard starts.
- Select Next
- Browse to the downloaded cross-sign certificate (R46 for RSA, E46 for ECC)
- Select Place all certificates in the following store
- Confirm Intermediate Certification Authorities
- Finish the wizard
- Download the correct cross-signed intermediate certificate based on your key type:
- If your SSL certificate uses RSA, download the Sectigo R46.
- If your SSL certificate uses ECC, download the Sectigo E46.
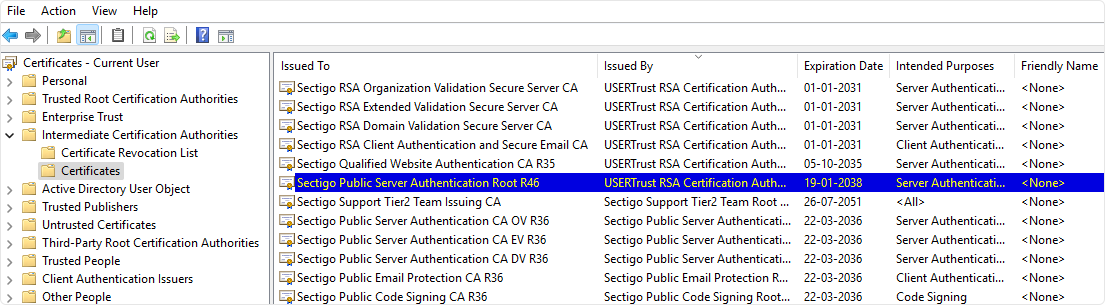
After import, you should see the cross-signed certificate listed in that folder.
If it lands somewhere else, delete it and re-import correctly. Don’t leave duplicates floating around.
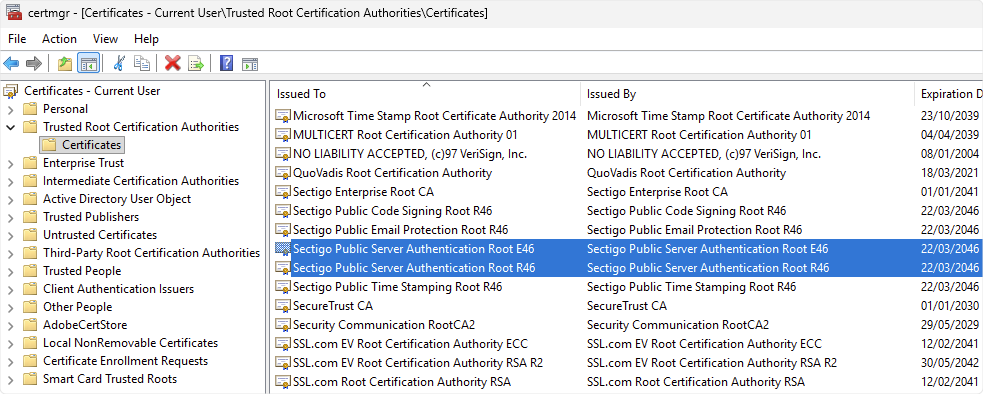
Step 2 – Remove Self-Signed R46/E46 Root (If Present)
If the self-signed R46 or E46 root is sitting in the Trusted Root store on the server, remove it. Look at the following screenshot to find the Self-Signed R46/E46 Certificates.
- Open:
Certlm.msc - Go to:
Trusted Root Certification Authorities → Certificates - Find:
- Sectigo Public Server Authentication Root R46
OR - Sectigo Public Server Authentication Root E46
- Sectigo Public Server Authentication Root R46
- Check the issuer column. If the certificate issued itself, that’s the one.
-
Right-click → Delete

- Confirm.
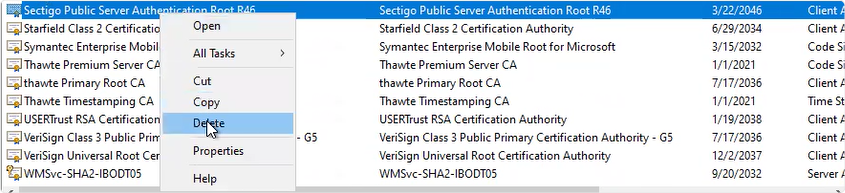
Leave the cross-signed version in Intermediate Certification Authorities. Only remove the self-signed root copy from the Trusted Root store.
Step 3 – Export the SSL Certificate as a PFX
You need the leaf (domain) certificate exported together with its private key as a .pfx file for IIS import.
- Open either:
- certlm.msc (Local Machine), or
- certmgr.msc (Current User)
Use whichever store actually contains the certificate and private key.
- Navigate to:
Personal → Certificates - Find your domain certificate.
- Right-click → All Tasks → Export
- When prompted:
- Choose Yes, export the private key
- Select .PFX
- Enable:
- Include all certificates in the certification path
- Export all extended properties
- Enable certificate privacy
Set a strong password.
Save the file somewhere secure. Don’t drop it on a shared desktop folder and forget about it. You now have a portable PFX with the full chain included.
Step 4 – Import the PFX into IIS and Bind It
Once the PFX file has been exported using Certmgr.msc, proceed by importing the newly generated PFX file into IIS Manager and then assign the certificate to the appropriate website by completing the steps below.
- Open IIS Manager.
- On the left, click the server name.
-
Double-click Server Certificates.

-
In the right panel, click Import.

-
Select the PFX file.
Enter the password.
Click OK.
-
Once it appears in the list, bind it to the site.
Navigate to:
Sites → Your Website
Click Bindings on the right.
- In the Site Bindings window:
- Click Add (or Edit if HTTPS already exists)
- Type: https
- IP Address: All Unassigned (or the correct specific IP)
- Port: 443
- SSL Certificate: select the newly imported certificate
Click OK.


Close the bindings window. At this stage, IIS is using the new certificate.
Step 5 – Restart IIS (Optional but Direct)
If you want the change applied immediately across all services:
- Open Command Prompt as Administrator.
- Run:
iisreset
That forces IIS to reload. - You can also recycle the application pool instead, but when you’re fixing trust issues, a full reset removes guesswork.
Step 6 – Verify the Chain
After everything is in place, check the public chain.
Use an external SSL checker such as:
https://www.ssl2buy.com/wiki/ssl-installation-checker
Enter your domain and inspect the chain.
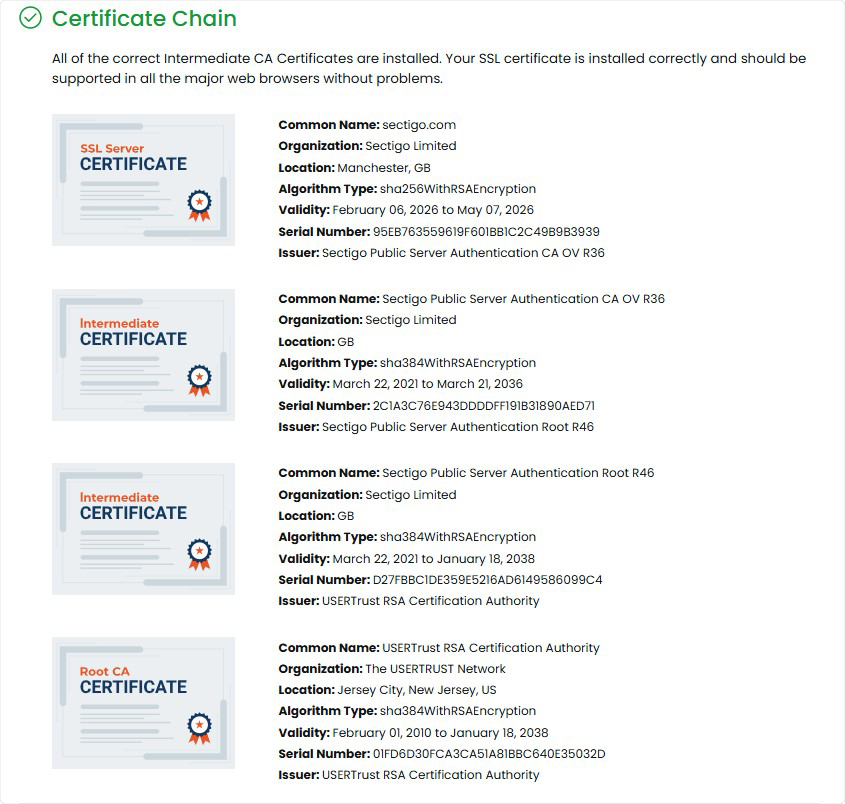
You should see:
- Your leaf certificate
- The cross-signed intermediate
- A trusted root
If older systems were failing before, they should now build the chain correctly through the cross-signed path.
Operational Notes
- Import into Local Computer, not Current User.
- Use Intermediate Certification Authorities, not Trusted Root.
- Do not rebind the certificate in IIS unless the private key changed.
- Remove duplicate or legacy intermediates if Windows keeps selecting the wrong chain.
IIS does not use a manual chain file like Apache or NGINX. Windows builds the chain from what exists in its certificate stores. If the correct cross-signed intermediate is present in the Intermediate store, IIS serves it automatically.
Related Article:
