VMware is a software company dealing in the cloud and virtualization software and services, situated in America. Wide ranges of products are developed by VMware, which includes desktop software, server software, cloud management software, application platform, and backup software and so on. Products offered by VMware are easily adapted by Microsoft Windows, Linux, and Mac OS X.
VMware server is the dynamic product which can create virtual machines and it runs on Windows OS and Linux. In this article, we will see how to install SSL certificate on VMware Server.
Obtain the SSL certificate
There are two ways of obtaining the SSL certificate: Creating a self-signed and another is purchasing the Certificate from trusted third-party vendor (Certificate Authority).
Among these, the Self-Signed Certificate is not recommended as it cannot protect your server from being eavesdropped by intruders.
Purchase an SSL certificate from the Certificate Authority (CA). Some of world famous Certificate Authorities are Symantec, GeoTrust, RapidSSL, Comodo, GlobalSign, AlphaSSL, and Thawte.
Choosing the appropriate certificate
Varieties of certificates are issued by the CAs for different security needs. SSL certificates can be categorized mainly into three categories:
- Single Server Name Certificate: This will secure and confirm the identity of a single server for e.g.: www.test.com. For those using single View Connection Server instance or those providing access to users to View Environment with a single URL, this type of certificate should be appropriate.
- Subject Alternative Names (SAN): SAN certificates will be useful to those who need to secure more than one server names along with the single certificate. For e.g.: www.test.com can be used for www.test-first.com
- Wildcard SSL certificates: Wildcard SSL certificates are named so because they add a wildcard character “*” before the name of the domain/server. Wildcard certificate will secure multiple servers. Also new additions to can be secured with the Wildcard certificate. For example, a certificate for, *.abc.com will secure test.abc.com.
Creating a Certificate Signing Request (CSR)
In order to get an SSL certificate issued, you will need to generate a config file and a CSR from the config file and send it to the CA. When the CA sends the certificate, you need to import the signed SSL certificate and store it into View Server host where the private key is stored.
There are multiple ways of generating the CSR depending on the generation of the certificate.
For Windows Server 2008 R2, Microsoft certreq is the tool used for generating the CSR and importing a signed certificate.
- Create a Certificate Signing Request Config fileThe Microsoft certreq tool will use a config file in order to create a CSR. Following is the process of creating a CSR config file; Paste the following code in a text editor along with the beginning and ending tags:
;----------------- request.inf -----------------
[Version]
Signature="$Windows NT$
[NewRequest]
Subject = "CN=View_Server_FQDN, OU=Organizational_Unit, O=Organization,
L=City, S=State, C=Country"
; Replace View_Server_FQDN with the FQDN of the View server.
; Replace the remaining Subject attributes.
KeySpec = 1
KeyLength = 2048
; KeyLength is usually chosen from 2048, 3072, or 4096. A KeyLength
; of 1024 is also supported, but it is not recommended.
Exportable = TRUE
MachineKeySet = TRUE
SMIME = False
PrivateKeyArchive = FALSE
UserProtected = FALSE
UseExistingKeySet = FALSE
ProviderName = "Microsoft RSA SChannel Cryptographic Provider"
ProviderType = 12
RequestType = PKCS10
KeyUsage = 0xa0
[EnhancedKeyUsageExtension]
OID=1.3.6.1.5.5.7.3.1 ; this is for Server Authentication
;-----------------------------------------------
- Change the attributes of the subject with relevant values for the View Server and deployment. Some of the CAs may restrict the use of the abbreviations for the ‘State’ attribute.
- Updating the key length attribute. This step is optional.Normally the value of the key length is 2048 until and unless you have special requirements. The larger the key, the more is the security but also, can downgrade the performance.
- Name the file as request.inf and save it.
Requesting the signed Certificate
With the help of config file, generate the CSR with the certreq tool. Send this as a request to a third party CA.
Process:
- First of all, open a command prompt in the Start menu and choose Run as administrator.
- Go to the directory where the request.inf file is saved.
- Create the CSR file. For e.g.: certreq –new request.inf certreq.txt
- From text editor open the CSR file and copy all the contents, including the beginning and end tags. Something like:
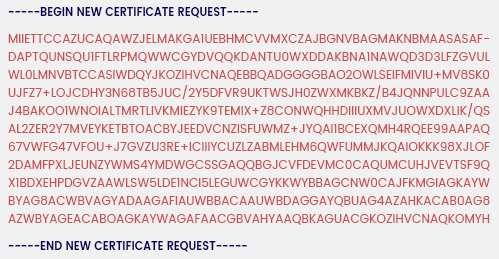
- Now use the contents of the CSR file for certificate request made to the CA by complying the enrollment procedure. After some verification process, CA will sign the request and will send an encrypted private key along with the certificate.
- Save the certificate in a text file with the name of cert.cer on the View server.
- CA will send root and intermediate CA certificates. Save the root CA certificate with the name of root.cer and intermediate CA certificates with intermediate.cer.
Importing the Certificate
You can use the certreq tool as well as some other method to import the certificate.
While using the certreq tool, the private key is local because it is on the server on which the CSR was generated.
If you want to use another method, then you can use the Microsoft Management Console (MMC) Snap-in in order to import the certificates.
Process:
- Go to the command prompt and choose Run as administrator.
- Go to the directory where the cert.cer file is saved.
- Run the certreq-accept commands to import the certificate.
After this, you are ready to use the certificate on your server.
Integrating the imported certificate for the View Server
After importing following steps should be taken to integrate the SSL certificate on View Server:
- Cross check the imported certificate.
- Name the certificate as vdm.
- Root and intermediate CA certificates need to be installed.
- View Connection Server Service, secure server service or View Composer service needs to be restarted to let the View Service use SSL certificates.
Converting the Certificate File
If the private key and obtained certificate are in PEM or any other format, you will be required to convert it into PKCS#12 (PFX) format.
